Wednesday, December 7, 2011

On Flour, on Sugar on Cocoa Powder and Imatation Vanilla...

Sorry I haven't been to chat the last...um, month. I've been scuba diving off the coast of Australia...and mountain climbing in the Swiss Alps. Oh. Yikes. I can't lie to you. Sorry.

Thanksgiving really kicked my ass to be honest. It was a great holiday, don't get me wrong but good Lord - turkeys, stuffing, mashed potatoes, cranberries, green bean casserole and corn bread casserole are just not up my alley.

The pumpkin pie and red velvet cake on the other hand - woot! I was to busy looking at salad, rolls, and stuffing to take pics during the process. Just use your imaginations. Here. I'll help. This is what the red velvet cake looked like...for the most part.

Impressive. I know.

Okay so now we're in the HO HO HO season and today I made 70+ reindeer cookies for a cookie exchange I'm doing with some of my favorite ladies! I loves me some cookies and in mass quantities - yay!

Well, my Grammy's sugar cookie and icing recipe, which are amazing, just had a bit to much work involved...but I ask you. What says Christmas more than sugar cookies? Nothing. So I found the next best thing. Reindeer cookies with pretzels for antlers.

Shopping list:
  • 3 cups flour
  • 1/3 cup unsweetened cocoa powder
  • 2 teaspoons cream of tartar (NOT tartar sauce)
  • 1 teaspoon baking soda
  • 1/2 teaspoon salt
  • 1 cup (two sticks) butter, softened
  • 1 1/2 cups sugar
  • 3 eggs
  • 1 teaspoon vanilla
  • Bag of pretzel twists
  • 2-3 bags of M&Ms
A few things to note about the M&M situation. Reason would tell us to use red candies for the nose. Well here is what I got out of 1 package of M&Ms.

Dis-AA-point-ed! So. Three more packages later...


I then gave up even a little bit more and took the orange M&Ms and added them to the red. Close enough.

Recipe:

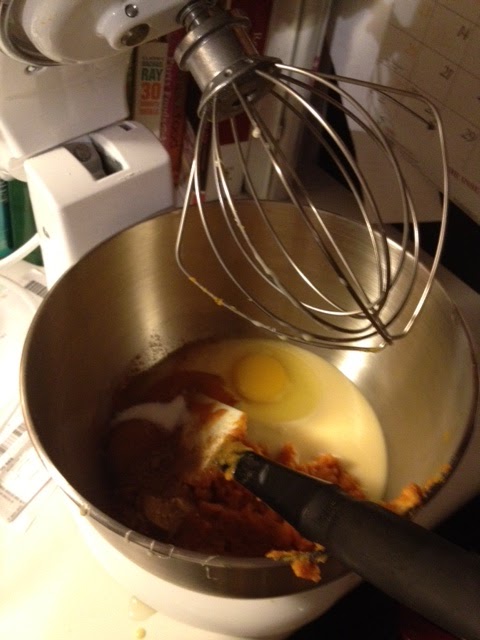
Mix flour, cocoa powder, cream of tartar, baking soda and salt.


Nope. That's not cheese. That's butter.

Get out the bowl you want all the mixing to happen in and beat butter and sugar. A note and a little friendly tip I saw on Pinterest. Oh Pinterest. If you're like me and never seem to read the directions before you start baking you realize half way into a step that you needed to do something - like thaw out butter. Soooooo I saw on Pinterest that to help thaw the icy cold butter a bit faster you can use a cheese shredder. Brilliant!

Moving on! Beat in eggs and vanilla. Gradually add in flour mix until well blended.

The dough is super dense, so be careful not to burn out the motor of your blender. Super thick.

Alright, so that whole pre-reading the directions thing will come in handy for this part too - wrap the dough in little packets (around 3-4) and stick 'em in the fridge for THREE HOURS!?!?!

I immediately said, "Eff that noise. I'm putting these bad boys in the freezer for an hour." And that's what I did.

The dough is not only dense it is crazy face sticky (< surly the 1 hour in the freezer/3 hours in the fridge wasn't the cause). Lay out a lot of flour on the counter, on the dough and on the roller.

Pre-heat the oven to 375.

I used a heart cookie cutter to make deer heads - I've seen some recipes use bell shaped cookie cutters too.

Press two pretzels on the top, add your nose and two eyes. YAY!

Bake for 7-8 mins.


They taste like chocolate sugar cookies. And pretzels and chocolate are yummy.

I'll be adding two more desserts to the blog this weekend - Fifth Annual Friends Christmas Party this Saturday.

I am exhausted. That was a lot of M&Ms and deer. Oh! And I only had 3 M&Ms left and a 75% full bag of pretzels.

Yum,
Laura

Wednesday, November 9, 2011

A Peice of Cake...er Pie

I have come to surface! I have been cheating on this calorie filled blog with hot glue, scissors, yarn and more hot glue. Crafting has taken over and it isn't making my butt bigger - so that's a plus.

But we all know where my alliance really lies - butter. Butter for President!!

A few weeks ago I joined three of my favorites for a dinner in and brought a Apple Crumb Pie. We got to meet new baby Josie - who is stunning and sweeter than pie. I bribe people with food so I can cuddle their babies. haha Look how beautiful she is!

Did I mention that my super awesome (non-dessert eating) Hubs got me an iPhone 4? It is so cool, I hardly know how it works but I love it and it has a great camera on it! The bad news is that I didn't have this sweet new phone/camera while making the previously mentioned pie. So - I have no photos of the pie...but here is a link to the recipe from BHG.com.

Wha-wha.

That recipe post was super lame - Josey made up for most of that but moving on!

On November 12 there is a great par-tay happening with some friends - Rock My Plymouth Party that is. Now I can't make this party because I'll be having slumber party with the Little People (baking, fort building, hide and seeking, movie watching, ice cream eating and so on) but I couldn't miss an opp to make a traditional Pumpkin Pie for the event.

I had attempted a fancy pants pumpkin pie last Christmas. Pumpkin Pie is my mom's favorite so for my first Christmas dinner hostessing experience I thought, "What better than to make this fancy pants pumpkin pie?" Well turns out it was a bit advance and more fancy than just pants...more like ruffled tuxedo fancy. Oy. It was pumpkin/carmel soup in a burnt crust.

I will not be defeated - I am smarter, wiser, and not as fancy pants. Traditional. Six ingredients and I'm not making the crust. BAM!

So here are the ingredients:
  • 1 16oz can pumpkin
  • 1 14oz condensed milk
  • 1/2 cup milk (as I typed this...I just realized I forgot to add this. HAHAHAHAHAHAHA Damn it. Strike one.)
  • 1 teaspoon cinnamon
  • 1/2 teaspoon ginger
  • 1/2 teaspoon nutmeg
  • 1/2 teaspoon salt
  • 2 eggs
  • Pie crust (Schnucks does a nice crust)

Wow. I cannot believe I forgot the milk. Crap. I even bought milk at the store because of this. Eff.

Ummm. Okay. Moving on. Guess I haven't graduated from fancy pants.

Directions:


Preheat oven to 450. Dump everything, except the dough, in a bowl and blend (gently) together.

Wow. That was tough. It would have been tougher to add the milk...but I'm not dwelling!

Roll/spread the dough across the pie pan (sending this pie in a disposable plate because I have a feeling I will never see the pan again if I send it to the party haha). I read in a blog once about stabbing the bottom of the dough with a fork a bunch helps it cook through and through. Okay. Sure. I'll buy that.
Our in pumpkin mix into crust. Using a fork make the cute little lines on the edge. You know what's even cuter than rippled edges? MILK IN A PIE. Frig.

Bake for 15 minutes. At this point, your house will smell heavenly.

Reduce heat to 350 and bake for another 35-40 minutes.

It took way longer than 40 mins. in my opinion. The article said to stick a knife in it to see when it is done.


Pie is great...tricky and fancy pants...but great. I don't know how the pumpkin pie tastes...luckily it will be consumed by very drunk adults dressed up as Pilgrims and Indians on Saturday...so they probably won't notice there wasn't any milk in the pie.

I'M OVER IT!

Yum,
Laura

Wednesday, October 26, 2011

Muffins for the Little Muffin

Well, it has been awhile friends. And although I have been baking (I'm actually baking as I type, such a multi-tasker) I haven't been blogging. So get ready.

A few weeks ago...aw hell, months now. My good friend and colleague Stevie (Death Claw) had a beautiful baby girl, Avery. Let's take a moment to adore this little girl for a minute.

She is fabulous and sweet and just too stinking cute. This Little Muffin deserves some Little Muffins. Done - and since it is Fall it is only fitting to make something with Pumpkins for this Little Pumpkin.

I should mention that I tend to refer to babies as food - pumpkin, muffin, potato, tater tot, hot dog...no, not hot dog but you get the point.


So I found a great recipe from The Pioneer Women for pumpkin muffins and since I'm super fancy I decided to throw some crazins in the mix. Yum.

Ingredients:
  • Muffin Mix
    • 1 cup all-purpose flour
    • 1/2 cup sugar
    • 2 teaspoons baking powder
    • 1 1/2 teaspoon cinnamon
    • 1/4 teaspoons ground ginger
    • 1/2 teaspoons salt
    • 4 tablespoons butter, cut into pieces
    • 1 cup (heaping) pumpkin puree (I just use the whole can, 16 oz)
    • 1/2 cup evaporated milk (that's about 2/3 of a can, annoyed? You should be.)
    • 1 egg
    • 1 1/2 teaspoon vanilla
    • 1/2 cups crazins
  • Topping
    • 1 tablespoon sugar
    • 1/2 teaspoon cinnamon
    • 1/8 teaspoon nutmeg
  • Frosting
    • F-that noise. Buy a jar of vanilla or cream cheese icing. You've done enough. :)

Directions:
Preheat your oven to 400 degrees and grease your muffin pans. Trust me, you do not want to use paper wrappers. I got to make this recipe twice because I used paper wrappers the first time and the muffin totally stuck to the paper and made a disastrous mess. So. Lesson learned there.

Sift the flour, sugar, baking powder, cinnamon, ginger, nutmeg and salt into a bowl.

Cut butter into chunks with a knife or pastry cutter until it is fully mixed. In a separate bowl, mix together pumpkin, evaporated milk, egg and vanilla. Pour in that mess into the flour mix. Add crazins...because they are crrraaazzzzy. Stir/mix it up.

Pour mix into muffin pan. Now, I don't have the steadiest hand so I have found that if you pour batter into a sandwich bag or a piping bag to get it in the cups without having a mess on the edges of the pan...and who likes to scrape pans? Not this lady.

Now this photo was taken when I was using the cursed paper liners but imagine they weren't there. Also, I know how yummy these muffins are, please don't be grossed out by how that looks...because I'm realizing that right now. haha Ew.

So, once the batter is in all the cups (recipe usually makes 12 - 18 muffins) sprinkly the topping mix on the raw batter. Now bake for 20 - 25 minutes.

Take 'em out when they are done, let them cool enough and scoop them out with a spoon. I got to use my sweet new piping bags and tip as well for the frosting. I don't like a lot of frosting so here they are.


Yummmmmmm. Hopefully Little Pumpkin Muffin's Mama and Daddy enjoyed these as much (if not more) than her wonderful arrival.

Yum,
Laura

Saturday, October 8, 2011

Boo! I'm a cookie.

Welcome to October. The month of spooky and scary things. Why should things that are sweet and sugar filled be any different?

 
I cannot take credit for this fabulous and funny (wow, there are so many adjectives in this post already) cookie. Let me be the first, if not second to introduce you to Pinterest. Pinterest is like Facebook with fun photos of DIY projects, food, drinks, quotes, clothes, dream kitchens, and anything you can think of! And it is pretty much boy free, which is kind of fun. I am obsessed and have logged a zillion hours on the site so far and I encourage you to do the same. Here is one of the easy (yet BRILLIANT) home projects I did that I found on Pinterest. Common sense but, man! That is sweet. I got the hooks/pull tabs from Target and hung 2 - 3 cups/spoons on each. Perfect and saves so much room. Love it.


Onto the haunting goodness. This recipe is crazy easy because well I gave myself a break. No homemade dough, icing or marshmallows. If you've got that kind of time on your hands, I tip my hat to you and will be calling you later to help me do laundry, sweep, mop, dust, redecorate my living room (which I'm at a loss - really if anyone has time and a good eye I could use some help), make the bed, organize my cabinets...you get the point.


Things you'll need to have to make the goodness -
  • Sugar Cookie mix (Betty Crocker, eat your heart out)
  • Vanilla Icing
  • Marshmallows
  • An egg
  • 1/3 cup of butter
  • Black icing
  • For rolling purposes

 
So make the sugar cookie mix and roll the dough out on a floured surface - about 1/4 of an inch thick. You don't need a perfect circle (you'll see why in a minute...hold your horses) but I like a nice juice glass to make circles for these cookies.


Preheat the oven to 375.
 
Okay, so no one's perfect, right? And since this is such a soul bearing blog I thought I'd throw these out there. Ashamed? No. Annoyed? Yes. Tried to eat them anyway? Hell, yeah. Ew.


A few reasons I think this happened -
  1.  I rushed. I tried having to pans of cookies in the oven at once and maaaaay have left the cookies on the bottom rack on a bit to long. Patience is a big part of baking I'm finding out.
  2. I sprayed the aluminum foil with cooking spray that is 'Butter' based...that can't be helpful, right?
  3. Listen to the timer. It beeped and I was rolling out dough for the next round. "Eh, a bit more time never hurts," continues to roll dough like a fool. A FOOL!
Moving on! So once the cookies (non-burnt and delicious) are cooled spoon some icing into a dish and microwave it for about 8 seconds. Using the back of a spoon spread the icing on the cookie and again I like that this wasn't smooth and in a shape. Have you ever seen a ghost who is a perfect circle...bet not. Also, taken the marshmallows and pinch them in half. Before you stick the marshmallow on paint the face on with a toothpick. It is was easier than trying to paint a face on something with a body.


Oh. My. Gosh. How stinkin' cute is that?! Oh. I mean terrifying. Very scary....and adorable! I got board with ghosts after awhile and tried my hand at cobwebs. The cobwebs on the right were first attempts, cookies on the left are better. The trick was to do the circles first and then the lines from the middle sweeping out. Fun. Fun. Fun.


I have a few other Halloween inspired desserts in the calendar. Also, I get to visit some of my lovely friends new babies this week and next and you know I'm not going empty handed - I have to win love some way and it might as well be with sugar, flour and butter. A lot more to come.

 
Yum...er Boo!,
Laura

Wednesday, September 28, 2011

Little Pillows of Delicious

The story begins about a week ago when I asked my colleague Andrew to bring me back a present from his work trip to New Orleans. Lucky for him, he brought me back the below amazing gift.

If this photo is an indication of anything...it should be that this will be a photo heavy post.

So since this alligator, er.. crocodile...gator type animal oven mit is from New Orleans it only seemed right to make something from the lovely south. Beignets it is!

What is a beignet you ask? A little pillow of delicious. I'm not a pro but after making these I believe these are donuts without holes. I digress.
If you're going to make these you'll need some equipment. You'll want this equipment so you don't burn down your house or make it smell like the floor of McDonalds. And because Hubs wanted to avoid both of these inevitable situations he picked me up, what I like to call, "Baby Mini Fry Daddy." Another handy tool Hubs picked up is a Flipper. The Flipper is clutch if you like your finger prints so, yeah. Yay for that!

Here are the ingredients and the recipe I used now that all the equipment was available:
  • 1 1/2 cups lukewarm water (don't get crazy with boiling or ice water people...somewhere in between. Why? No f-ing clue)
  • 1/2 cup sugar
  • 1 envelope active dry yeast (there is a different in yeast types...that's all we'll say about that)
  • 2 eggs
  • 1 1/4 teaspoons salt
  • 1 cup evaporated milk (different then cereal milk)
  • 7 cups of bread flour (don't even think about using all-purpose, self rising, normal human flour)
  • 1/4 cup shortening (fatty fatty. No literally it is fat)
  • Oil, for frying (you'll need about a quart)
  • And at least 5 cups of powdered sugar

Mix water (not hot you fool!), sugar and yeast in a large bowl. Now that I am looking at this recipe and retyping it...I just noticed it said let sit for 10 minutes. I did not do this. Whoops.

Ten minutes later, in another bowl, beat the eggs, salt and evaporated milk together. Add the egg mix to the yeast mix that's been sitting there for 10 minutes.

Sift the bread flour into another bowl - be sure all of your bowls, spoons, etc. are clean in your kitchen...you'll be using many items.

Add three cups (why three? no flipping clue) of flour to the mix until mixed. Add shortening and continue to add in flour. It is crazy sticky. So please don't underestimate the amount of flour you'll need to put the dough on to knead until smooth...and not so sticky.

Spray a large bowl (larger than you think you'll need) with non stick spray and put the dough in it. And here's the kicker. Cover it with a dry dish towel and set aside in a warm place for at least 2 hours. Shocked and annoyed? Yup, ya are.

Here are a few things that I did in those two unexpected hours I had to kill last night:
  • Take out the trash
  • Strip the bed
  • Two loads of laundry
  • Mop the basement floor (it is always dirty...no one ever goes down there but it is always so flipping dirty!)
  • Put away newly washed clothes and remake bed while re-watching the episode of The Office when they're at the beach and they wrestle in the sumo outfits - classic
  • Wash and put away the 24 dishes and spoons used to get to this point
  • Um....I think that was it.

Two hours later the dough in the bowl is doubled in size and spilling over the sides of the bowl.
Roll the dough out on a floured surface so it's a 1/4 inch thick. The dough is really springy so when you roll it out flour will go everywhere meaning onto your feet.

After the dough is rolled out preheat your fryer to 350 degrees and cut the dough with a pizza cutter. Depending on how big your fryer is cut them to 1x1 or 2x1 pieces.

Ta-da!

I don't know how else you tell that oil is ready unless you have a fryer that tells you. I got nothin' for ya' otherwise.

So now that the little squares are ready...it is time to go outside! Here's a few photos to show you what I was dealing with in the elements.

Reptile friend loves some fried goodness


Joey served as quality control while Sammie did a
million laps around the backyard following my shadow.


These don't take long to golden up on each side and you can do several at a time without fear of creating  MEGA BEIGNET. When their light brown on each side toss them into a paper bag with some paper towels in it. And then after lots of frying, flipping, splattering and so on later take out the paper towels and dump in the powdered sugar and just shake the crap out of the bag.

Pillows of delicious in a bag people!!

A quick lesson learned from this morning however - if you put these lovelies into a bag and let them set overnight they will look more like glazed donuts. These seem like they are best made and served in the same 12 hours. Noted.


Also a shout out to Mom for my sweet new apron. That's right, it has the name of the blog on it. This just in the blog is now known as, "Face Plant into Fatty Goodness." Just kidding. :)

Yum,
Laura

Monday, September 12, 2011

Ode to Summer

Although it was 80+ degrees today I feel that fall is upon us. Reasons why:
  • Starbucks is now surving the epic Pumpkin Spice Latte
  • There was an evening where it was about 60 degrees out - bonfire weather peeps
  • I'm bored with sandals and flip flops. Bring on the boots!
  • It is apple picking season at Eckert's Farm
  • The Apple Pie Concrete is at Bobby's
  • Football started, which always makes me want to make soup or chili (Reigning Chili Champ at Weber St. Louis by the way)
  • Target has Halloween candy out, which taunts me while I look at new sheets, Tide, toothpaste, and TP

While I revel at the idea of Fall and chilly evenings, I thought I'd take a step back and look at Summer 2011.

A great trip to Dallas to visit Mom and Dad where we got to bake in the 110+ degree heat and visit with friends. I made Oreo Balls for a BBQ (note to self, buy Mom a food processor) and we enjoyed more Shiner brews than should be legally allowed.

Family re-union in Chicago was great and was one of the hottest/most humid days in the history of the world. I didn't bake anything but there is a lot to be said for Fried Chicken, Taco Dip and other picnic food goodness.

Ryan and I took a week away from the world and enjoyed the Gulf of Mexico in Gulf Shores, Alabama. Beautiful beach, no tar balls and I ended up drinking my desserts instead of baking them.

Mom, Sis and I ventured to Ft. Myers, Florida to enjoy food, sun, trashy books, shopping and MORE shopping.

But all of these things are no match for what happened tonight. Angel Food Cake with homemade whipped cream. I am not kidding.

Tonight I made my first Angel Food Cake - I got the idea when I bought strawberries and realized strawberries are quickly going out of season. So to send the blog off instyle and to bid 'adu' to Summer I thought this would be a good recipe to try.

Angel Food Cake

Ingredients:
  • 8 - 9 eggs (Oh, you read right people. The recipe called for 12 egg whites or 1 1/2 cups worth of egg whites - for me it was 9 egg whites)
  • 1 1/4 cup powdered sugar
  • 1 cup all-purpose flour
  • 1 1/2 tsp cream of tartar (I still have no idea what the purpose of this 'spice' is but I tried some of it and it is gross)
  • 1 1/2 tsp vanilla
  • 1/2 tsp almond extract
  • 1/4 tsp salt
  • 1 cup sugar

Directions:

Get a lot of time on your hands. Not the quickest recipe in the book folks.

Measure egg whites to equal 1 1/2 cups (sorry it is kind of blurry - I swear I wasn't drunk).

Now, let them sit out for 30ish minutes to get to room temperature. I thought this was weird but I went with it - surly this makes it more delicious and non-bacteria filled. Whatever.

While the eggs are sitting out (ew) sift the powdered sugar and the flour into a small bowl.

Once the eggs are hot - no, not hot - room temperature, you can preheat the oven to 350.


Start beating the egg whites at a high speed and add cream of tartar, vanilla, almond extract and salt. Once these are mixed well, gradually start adding in the sugar. Now the directions I have say to keep beating until the sugar is dissolved and 'stiff peaks form.' Seriously? What the H does that mean? I go by time people. Should this take 2 minutes? 18 minutes? Put a timeline to it - so, I made a video of once it was finally to that point. It took about 8-10 minutes of beating.

To put it in even more perspective, it tasted like and felt like non-sticky marshmallow fluff. Yum. If it weren't full of warm, raw eggs I would have enjoyed way more of this batter by itself.


At this point, gradually add and fold in flour/powdered sugar mix. Once mixed spoon into pan. I used a metal bunt pan I bought at Target (Oh Target, I would write you a love song if I knew how to play the ukulele). I read an interesting tip that recommended taking a knife and running it through the batter to help get rid of air bubbles that may have formed when the batter was being poured into the pan. I did this and then tapped the pan on the counter top and that seemed to force a couple of air bubbles out.

Bake for 35 - 40 minutes. The batter will raise up really high and you will probably panic like I did that it will spill over the sides. But it won't. Don't worry. Maybe worry a little bit.

I always make fun of the cake tester sticks at the kitchen shops but this is one time the 'stick a tooth pick in it' method was not going to be helpful. A bunt pan is about eight inches deep - tooth pick, two inches. Oye.

Now if this was for a party, I'd put this on my super cute cake tray but this isn't. This is for me, sitting on the couch in my 'yoga' pants and U of I t-shirt watching Family Guy and Will & Grace re-runs. Don't judge me. There is no judging in this blog.

Also, when cutting the cake use a serrated knife, like a bread knife. Otherwise it will squish. Yup, squish.


I am about to blow your mind with the best recipe evvvvver. You will never buy Cool Whip again. Never. I have seen the light...and the light is homemade whipped cream.

Ingredients:
  • 1 cup heavy cream
  • 1 Tbs powdered sugar
  • 1 tsp vanilla

Directions:

Beat cream on high until it thickens up and add powdered sugar and vanilla then beat it some more until it is thick. That's it. Seriously. That's it.

Whip it up until it is like whipped cream. You can make it sweeter by adding more powdered sugar but be sure not to beat it to long or you'll end up with something to thick - like butter. Ew. This took a total of about 10 minutes. I also read that it is best to chill the bowl and the beater. Not sure why but if the Internet says it, it must be true.

And because I'm a glutton for punishment I looked up how to make strawberry garnishes. Turns out there is only one out there and it is really simple. Thank goodness. After I plated these two pieces of cake for myself (NO JUDGING!) I realized I should have done this on cuter plates instead of my classy paper plates. But eh. It is the cake we should focus on.

With grated dark chocolate

Simply Summer
I do not expect this cake to last long in my house.

Cheers to Fall friends, I hope you enjoyed the Summer as much as I did and here's to many pumpkin-apple-nutmeg-chocolate-cinnamon treats.

Yum,
Laura

Tuesday, August 30, 2011

When the craving hits...

"Great dinner Bud" - Laura
"Yeah, that hit the spot. I'm so full." - Ryan
"Yeah." - Laura
"I mean I'm stuffed." - Ryan
"Mmm hmm." - Laura
"So, do you want to watch an episode of The Off..." - Ryan
"I need something chocolate." - Laura
"What?" - Ryan
"I need something chocolate. Now." - Crazed lunatic

We all have our cross to bear. I know that. Unfortunately, mine is covered in chocolate. I would rather work out for two hours every day (which I don't) if that meant that I could eat whatever I wanted (which I do). Dessert after every meal makes Laura a happy chica. I have a sweet tooth and post-dinner is when the craving really hits.

This is the exact reason I don't buy the following...I will eat them.
  • Oreos (Double or Regular)
  • Hershey Kisses or Hugs
  • mini Kit-Kats or any other 'Fun Size' candy bar
  • Wafer Cookies
  • Those amazing Keebler Fudge Sandwich cookies
  • Girl Scout Cookies (all)
  • Ice cream (all)
  • M&Ms
  • Donuts
  • Chips Ahoy
  • Cool Whip
  • Pudding Cups
  • Carmel Squares

Sure, it will start out innocent enough - just two, okay maybe three, to take the edge off. And then I become a crack feend in need of a fix and before I know it a whole sleeve of Double Stuff Oreos have been dunked and consumed.

Halloween is a very tough time in the High Household for candy - buying a variety bag, or two, on October 1 with good intentions...and then more candy bought that I don't like on October 30 because I ate everything the first go around. Lesson is never learned.

So when the above dialogue took place this evening I hit the kitchen to see what I could pull together without involving getting into the car to buy ingredients or driving to Bobby's...sweet, wonderful Bobby's.

This craving lead me to a wonderful recipe I found online from the FoodNetwork.com for a Chocolate Chip Cookie Cake.

I love this recipe because I had all the ingredients (like any chocolate crack feend should) and it was sooooo fast! Like ingredients pulled out, mixed, jammed into a pan, baked and cooled in less than 45 minutes! I won't even retype the directions or ingredients because it honest to goodness is that simple! I didn't do the white chocolate chips, nuts, etc. Just Plain Jane chocolate. Delightful.


Here's hoping your chocolate craving was settled by this post. I know mine was.

Yum,
Laura

 Funny Reminders Ecard: Don't touch my chocolate.

Sunday, August 28, 2011

It Is A Dog Eat Dog Treat World

Now that we're back  from vacation (take that robbers who didn't even know we were gone), the oven has been switched on and dough is-a-mixin'.

Ryan and I spent a wonderful week in Gulf Shores, Alabama. The sand, ocean and beer was wonderful but oddly enough, the entire time we continued to say, in one way or another, "I miss the dogs." Sammie and Joey, or to be more specific - Samantha Jones Sock-Thief High and Josephine Potter Cuddle Bug High - are our furry babies as they're known around our house. Sammie recently turned three and Joey will be two in October. Awe, how they've grown. Anyway, we left them at home all week (thank you again to the wonderful friends who peeked in on them) and when we got back it only seemed right to dedicate this post to them...and make dog treats.


Joey and Sammie being good - don't blink...you'll miss it.


One of my favorite recipes is a dog treat recipe I found awhile back and it has been a howling favorite of the pups.

Delicious Dog Dandies

Ingredients:
  • 2 beef bouillon cubes
  • 3/4 cup hot or boiling water
  • 2 1/2 cups flour
  • 3/4 cup nonfat dry milk (how this is even possible blows my mind)
  • 1/2 cup oil
  • 1 egg
  • 2 tablespoons of light brown sugar


Wall - O - Cookie Cutters!
 
First things first. Get cute cookie cutters. This brings me back to the Great Wall of Cookie Cutters at the Chef Shoppe. I took a picture of it the last time I was in its presence. There is another stand full of delightful Dough Shapers behind me in this photo but my goodness - you should get the point.


They have lovely shapes that many dogs would appreciate - fire hydrants, bones, squires, and dead bunnies. Ugh, if you didn't get that last reference give me a call...we'll chat and you'll have a good laugh at my expense. Let's just sum it up that Joey brought me a dead bunny and laid it on my lap while I was on the couch. I didn't know it was a dead Thumper until I touched it thinking it was the dog. Needless to say I jumped about four feet in the air and the dead animal went flying. I called Ryan and he giggled while I cried and laughed at the ridiculous situation the dog had put me in...again...on MY BIRTHDAY.

Oy. Moving on to the baking...that's why you're here right?

So once you have your shapes of fun, dissolve the bouillon cubes (also known as the best part of Ramen Noodles) and the hot or boiling water.

In a large mixing bowl combine flour, oil, egg, dry milk, beef broth, and brown sugar.

This is a cookie dough but this is not like a normal dough. It is really sticky so keep the flour out. I recommend sticking the bowl in the fridge for a while - the warmer it is, the stickier it gets.

Sprinkle flour on the counter and roll the dough out (flour the pin - you'll thank me) to about a 1/4 of an inch. Speaking of, why do they do that? I never know what that means and I don't keep a tape measure in the kitchen. How about as thick as 20 pages of a cookbook or three slices of cheese. Come on people, don't be silly.


Now is probably a good time to preheat the oven to 300 degrees.

Cookie cutter away people!! I have a set of three bones. I also have an awesome set of 'dog themed' cutters my lovely mother-in-law got me but they are currently hanging out with my Christmas cookie cutters. I like to think they're patiently waiting for November 27 when I go full 'Deck the Halls' mode.


These were, honest to God, not staged. These dogs are professional beggars and I always have the camera at the ready - you've been warned.

Spray the bejesus out of the pan or the aluminum foil and bake for 30 minutes. Don't worry about spacing the cut outs to close together or anything - they don't expand and won't form a mega cookie like so many other cookie doughs tend to do.

Done. Easy and super fun to give as gifts to other loving puppy parents. Speaking of. Here are three gifts I put together for friends who helped babysit the pups. Umm, I hope they don't read this tonight but these are to dang cute not to post.

Thanks to Mom and Sis for aiding in the pouring and price tag removal process.

Another cute treat I've seen are large Milk Bones half dipped in white chocolate. White chocolate (in moderation) is okay for dogs - NOT to be confused with milk or dark chocolate, which is bad. Anyway, cute cute cute.

Planning to post mid-week, perhaps muffins.

Yum...or Woof...no. Yum,
Laura